Creating New Users
A basic guide to how to make a new user
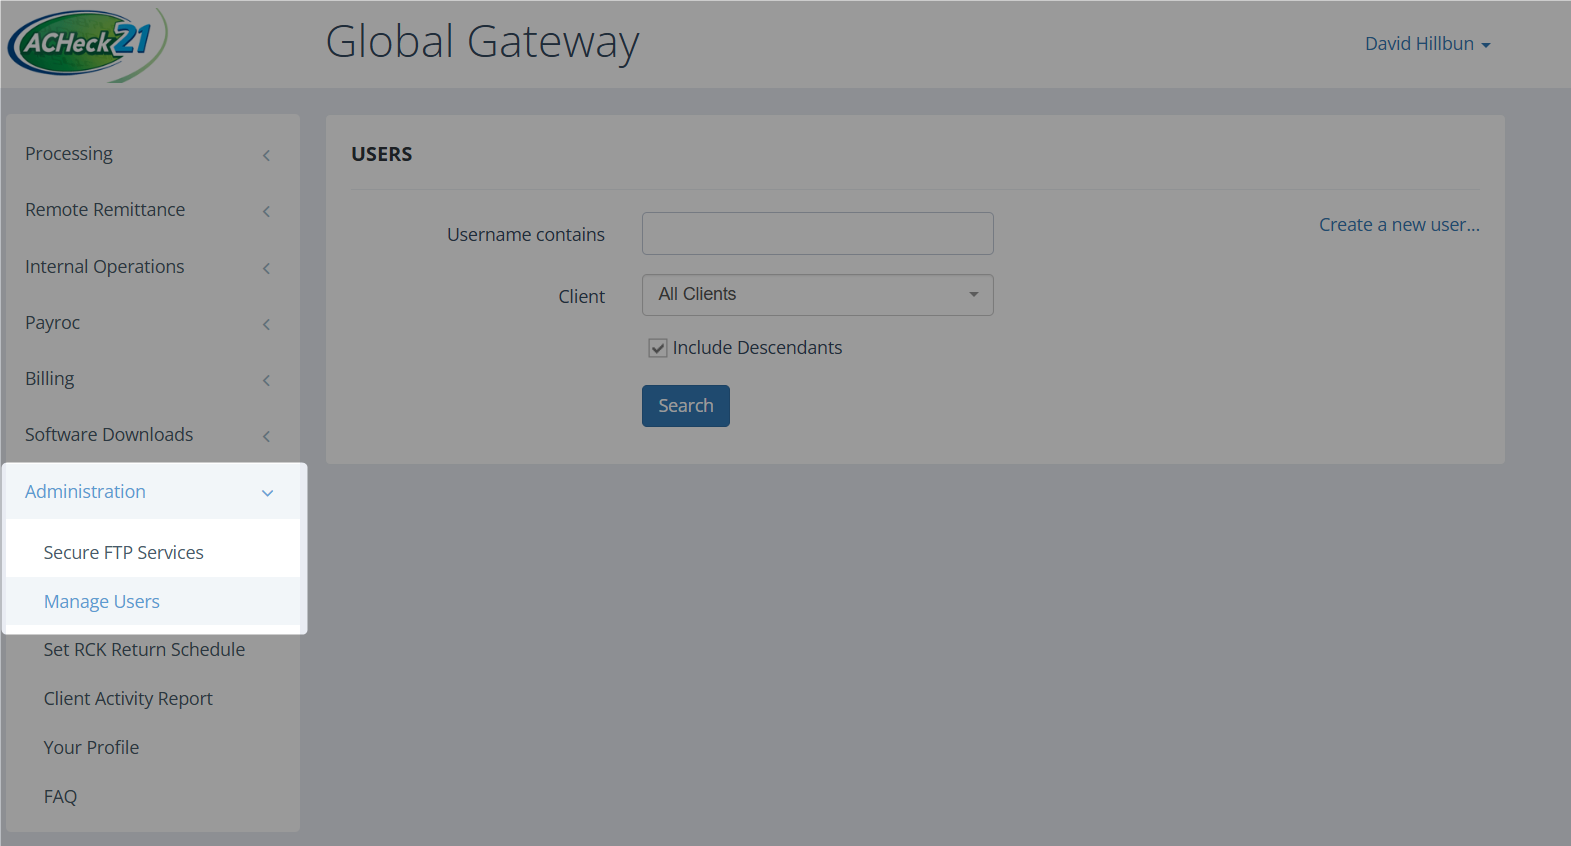
The first step is to go to Administration -> Manage Users**
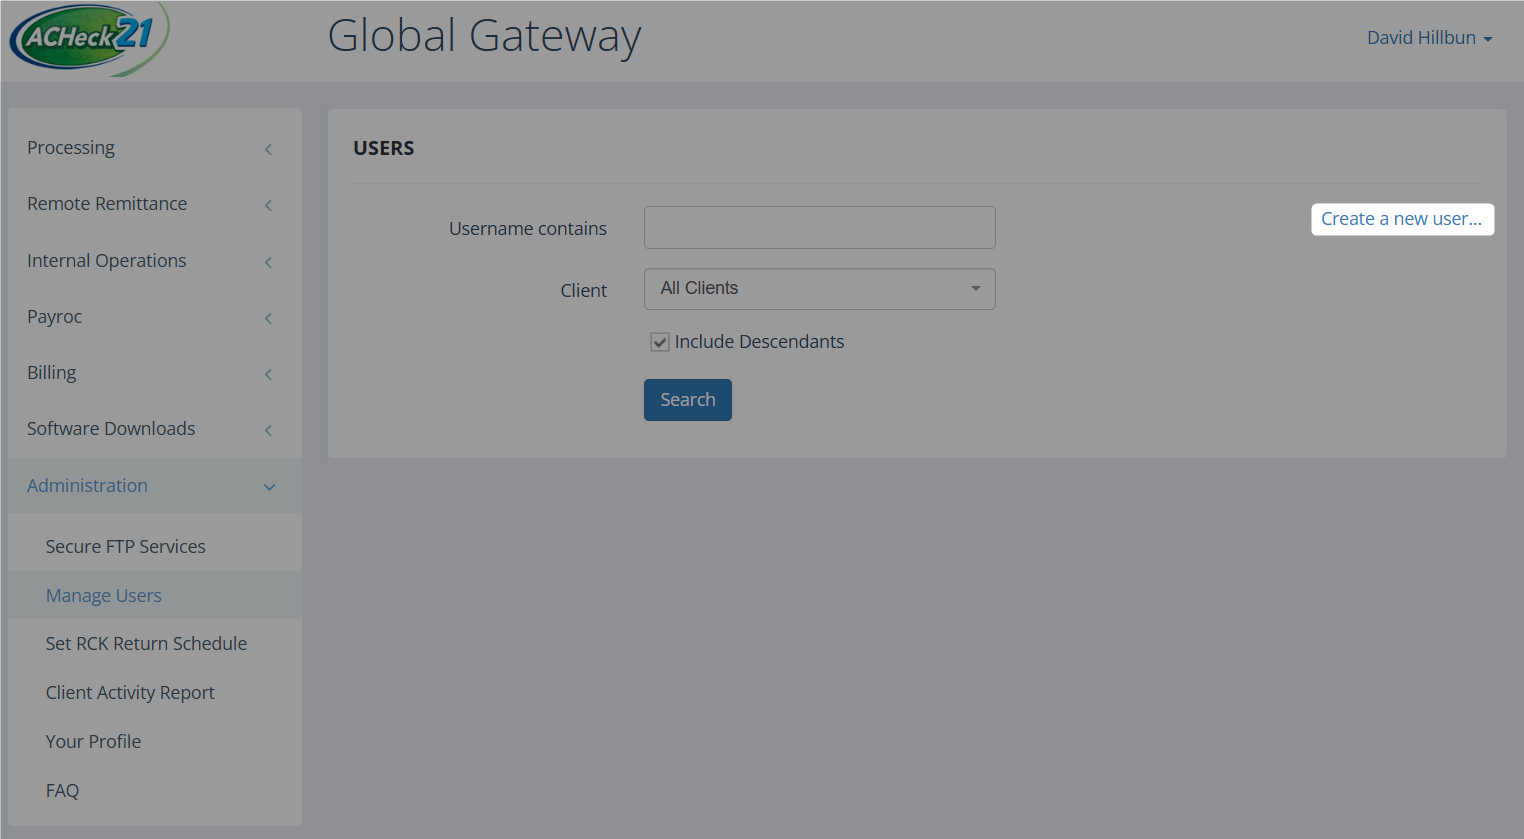
Next, click Create a new user...
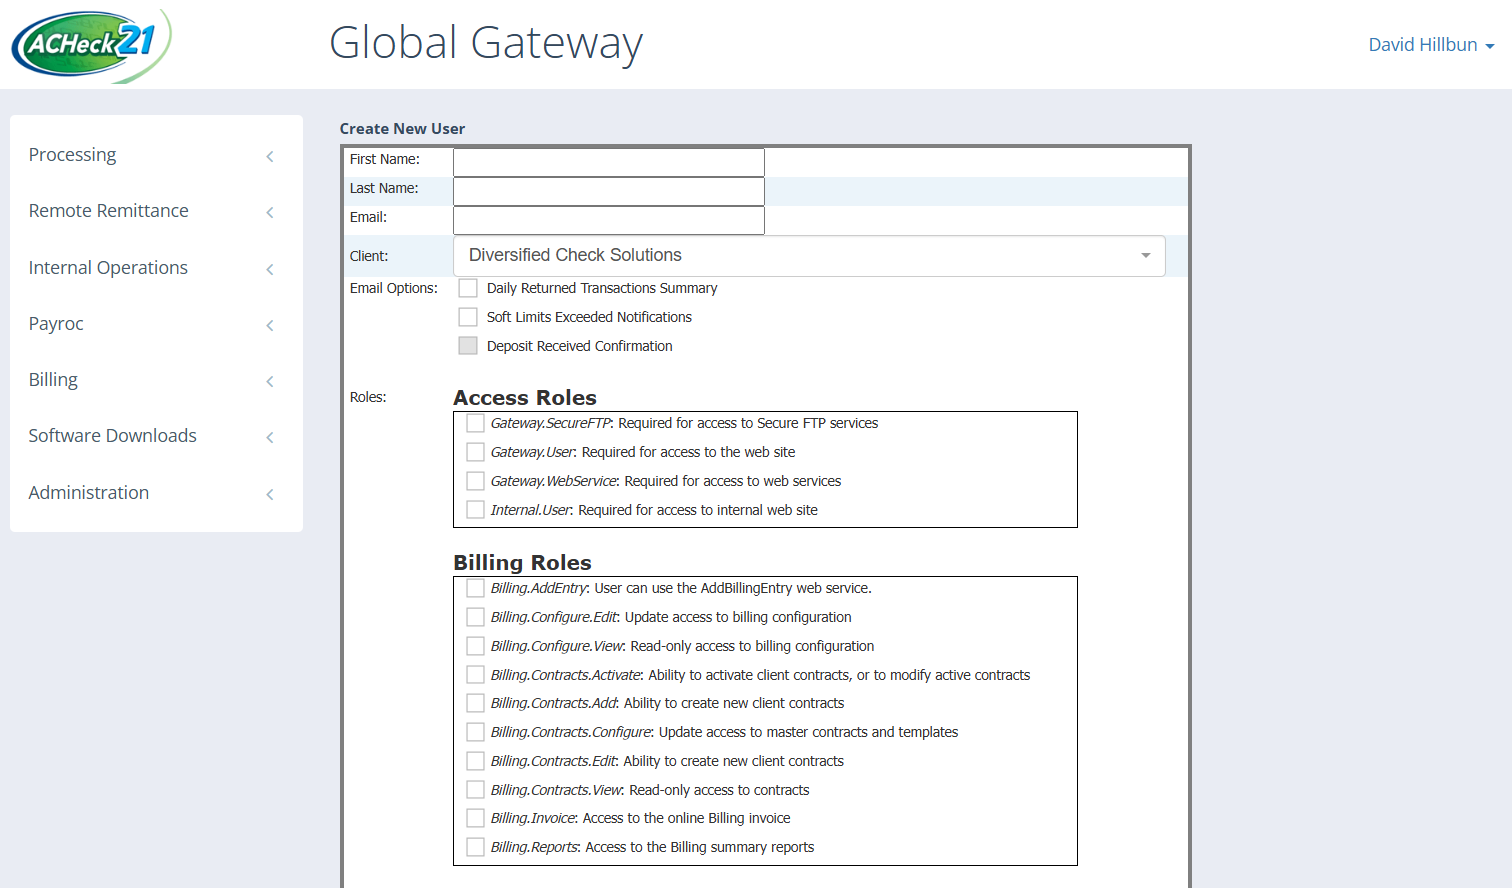
This screen is where you will setup the new user. For the "Client:" option, you will select the specific merchant the user needs visibility over. The following roles are highly recommended as a base line;
Gateway.User - This role is required for the user to be able to access the ACHeck21 Gateway.
Gateway.Deposits - This role allows the user to be able to view the batches and disbursement tabs
Gateway.Returns - This role allows the user to view the "Returned Transactions" tab so they can view all their items that have returned.
Note: For the email options, "Deposit Received Confirmation" is for specific circumstances and is not for notifications for when funds are sent to a merchant.
Other potential roles you may wish to give are;
Internal.Manage - This allows the user to create more users
Billing.Invoice - Allows the user to view invoices from ACHeck21 if the merchant is invoiced directly by ACHeck21
Gateway.E-Check - Ability to create ACH transactions manually via the ACHeck21 Gateway. We do not recommend utilizing this feature as it could lead to lapses in reconciliation with point-of-sale terminals or accounting software.
Updated over 1 year ago