ISO's Guide to Masters and Sub-masters
The system by which merchant accounts are able to see the processing activity of multiple other merchant accounts and receive reports for them is based on a "tree" system. The diagram in figure 1 demonstrates how this flow of information functions.
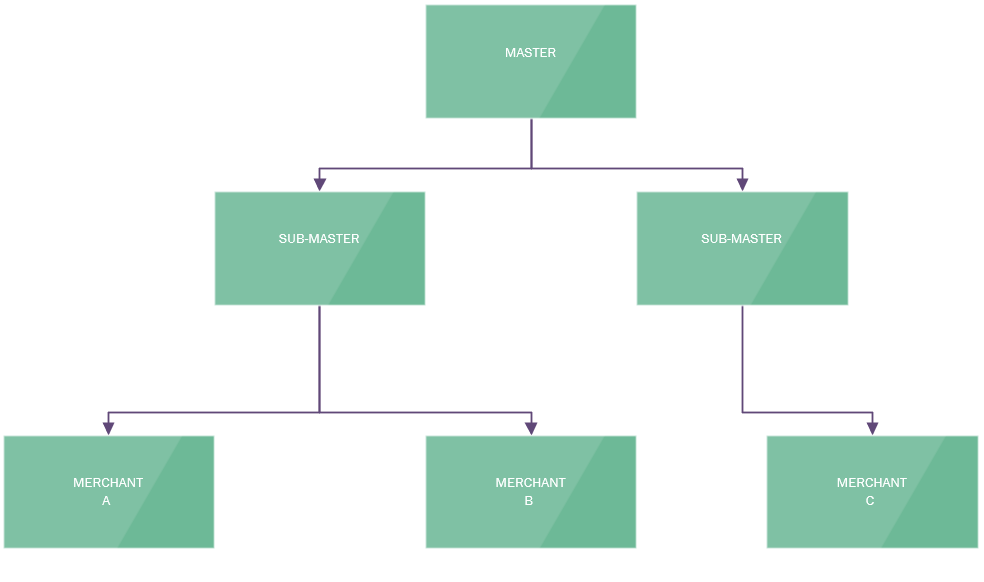
Figure 1.
As demonstrated in Figure 1, the box labled "MASTER" represents a master account. It can see all the information of the accounts below it (the two Sub-Masters and the three merchants) but they cannot see up the tree. The left Sub-master can only view Merchants A and B and the right Sub-master can only see Merchant C. So, if a user is assigned to the "Master" account, that user will see everything below it in the tree but a user assigned to the left Sub-master will only see merchants A and B.
To create a master account, you must create a new account like you were boarding a new merchant. A top level master that reports directly to the reseller (For example if you're a payroc ISO, it will report to PayrocFNBO) can only be made by ACHeck21 or the related reseller. Users creating a master can only set "reports to" relationships to the same level of the tree the user is assigned to, or below. So, for example, a user attached to one of the "Sub-masters" in Figure 1 can only set a new master to report to that Sub-master or the merchants below it.
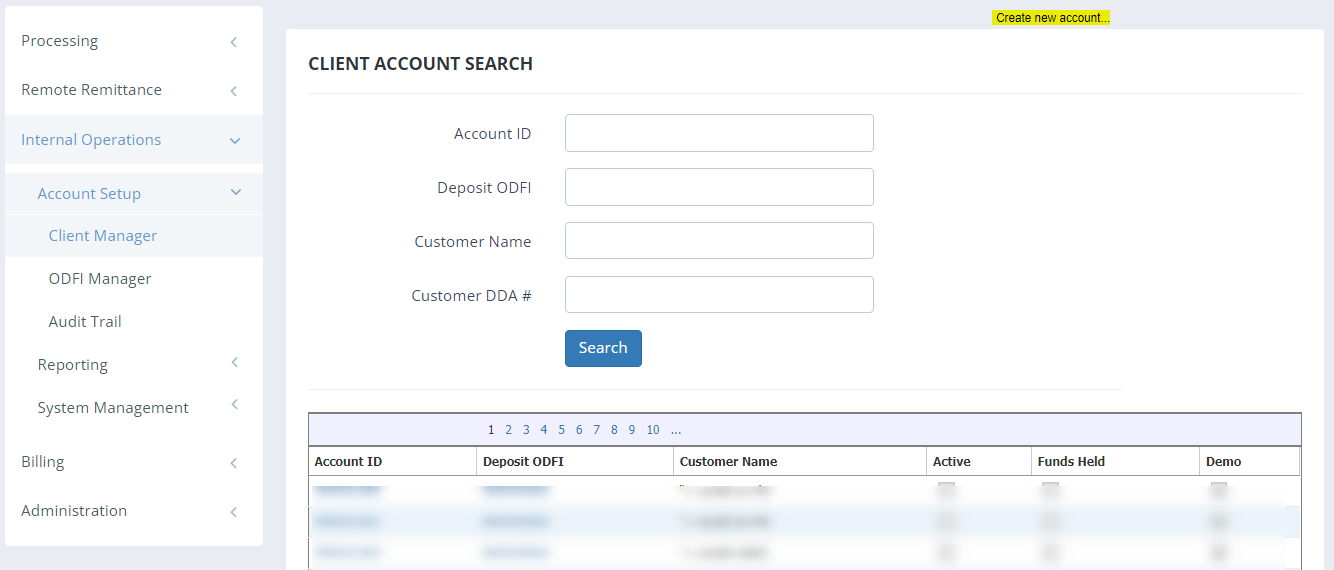
Figure 2. Create New Account
This will bring you to the Boarding App wherein you will fill out both account and routing number with false information. We recommend using 123456789 for both the accounting and routing number and assign it to Report To the master created by either your reseller or by ACHeck21.
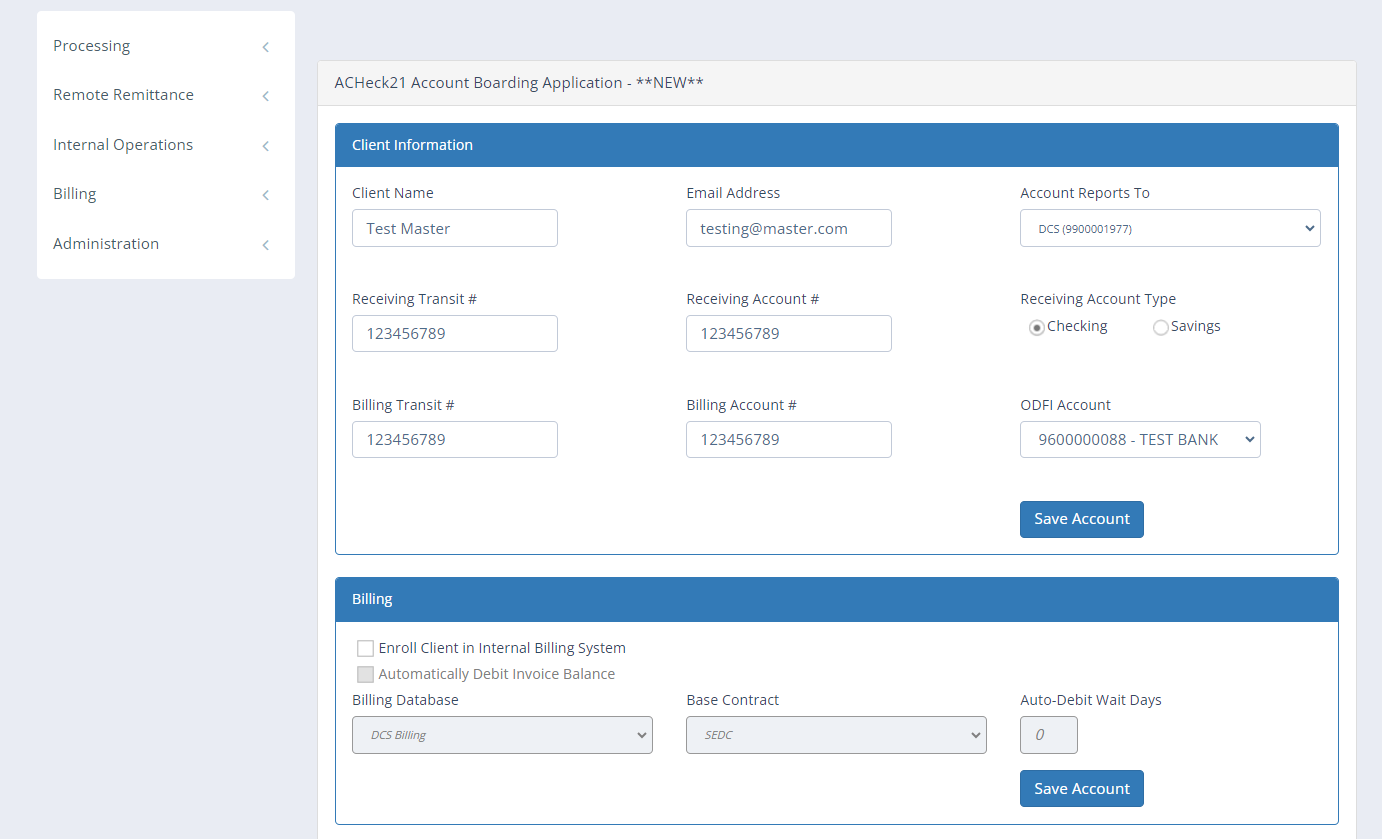
Figure 3. Filled Boarding App
Next, click the "active" checkbox to make sure the new master is visable and functional. It will not be able to process as long as it has no allowed transaction types, but users assigned to it will have the visibility to view any further sub-masters or merchants set to report to either this new master or any sub-masters set to report to this master.
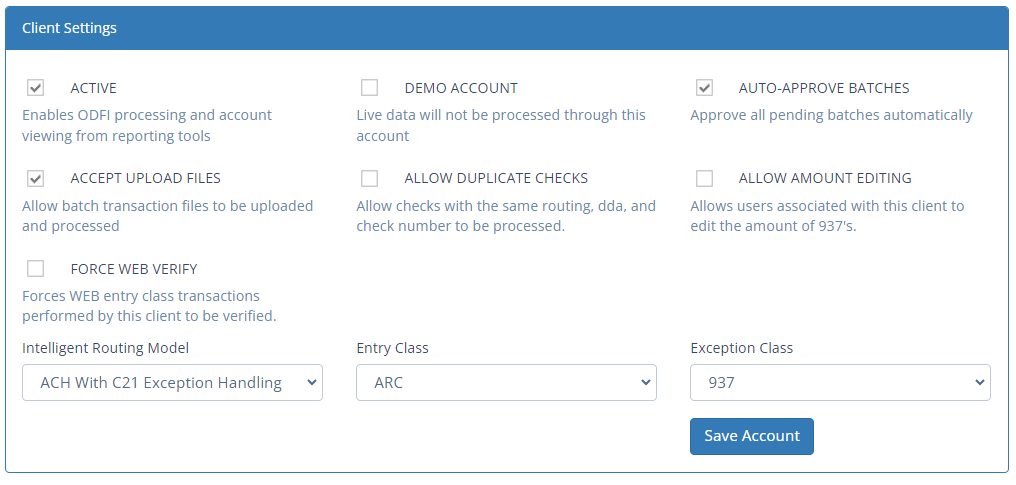
Figure 4. Active
After this is completed, any related users need to be manually assigned to this new master and they will have visibility over any account set to report to this master directly or any account below this master that reports to either this master itself or another account that reports to this master. Please refer to figure 1 again to refresh how the tree works.
Finally, when creating a master, make sure the master does not report to a live merchant below it's intended place in the tree, as that will show no info as it is now at the bottom of the tree in Figure 1.
Updated almost 3 years ago